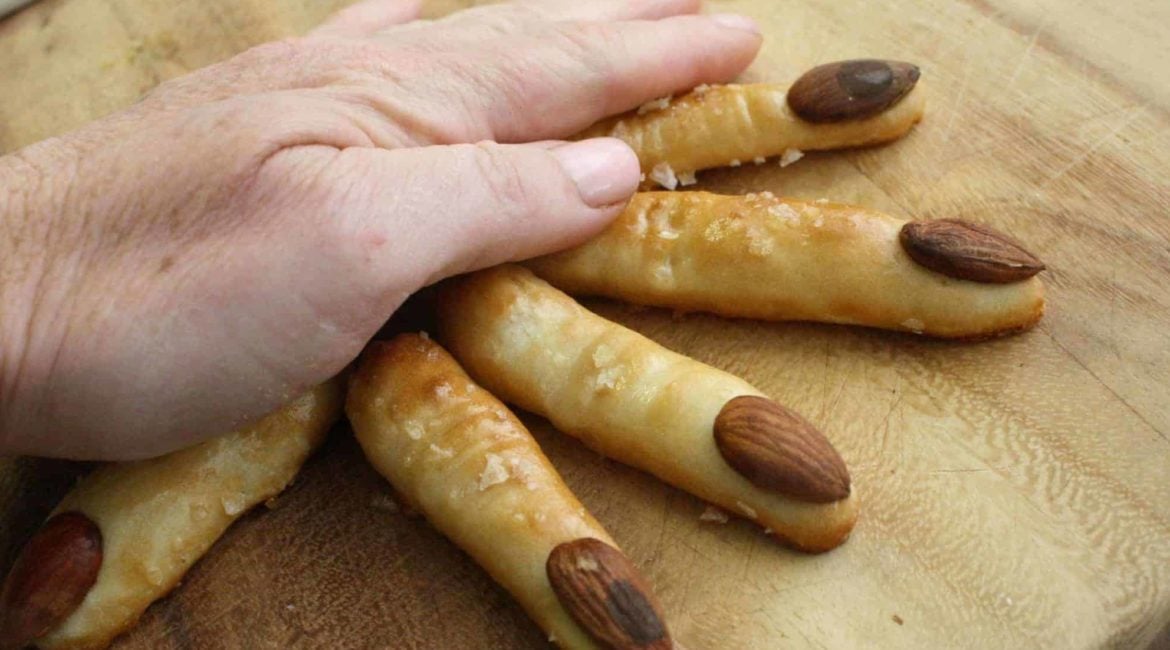
Pretzel Fingers

Pretzel Fingers for Halloween
Scary food? Nope, NOT AT ALL my thing! Well…not when I started my research anyway. Now I am right into it and have spent hours sifting through the copious amount of information on the web to find me a SCARY recipe for the upcoming Halloween goings-on.
I could have made skeleton cookies, spider’s web cupcakes or chocolate spiders but I am in the mood for real food this month, not sweets. Something bread-y or biscuity or savoury. And gross-looking fingers with red nails seem to be a common theme for Halloween…so I am thinking breadsticks…baguettes…pretzels! But I don’t want my pretzels to look so scary and gross that no-one wants to eat them so I have come up with a compromise. I think Pretzel Fingers with Almond Nails should do the trick!

First, I need a soft pretzel recipe. Easy! An Australian recipe website gives me exactly what I need: allrecipes.com.au has a ‘German-Style’ pretzel.

Pretzel Fingers
Ingredients
- 7 g dried yeast
- 1 1/2 tbsp brown sugar
- 1 tsp sea salt
- tsp Black Pepper freshly ground
- 1 1/2 cups warm water
- 1 1/4 cups bread flour
- 3 1/4 cups plain flour
- 2 cups warm water
- 1 1/2 cbsp bicarbonate of soda
- 50 g melted butter
- 1 pinch sea salt
Instructions
- In a large mixing bowl, dissolve the yeast and brown sugar in 375ml warm water.

- Stir in flour and salt, and knead dough on a floured surface until smooth and elastic, about 8 minutes. (I did it with the dough hook of the Kitchen Aid)

- Place in a greased bowl, and turn to coat the surface. Cover, and let rise for one hour.

- The dough will at least double in size.

- After dough has risen, cut into 16 pieces.

- Combine 2 cups warm water and bicarb soda in a bowl.

- Roll each piece into a rope, pencil thin. Cut into 'fingers' or leave whole and twist into a pretzel shape, and dip into the bicarb soda solution.

- If you are making 'fingers', place an almond at the thinner end for the 'nail'.

- Place on baking paper covered baking trays, and let rise 15 to 20 minutes.

- Bake at 230 C (450 F) for 8 to 10 minutes, or until golden brown. Brush with melted butter, and sprinkle with coarse salt.

- ROLLING A TRADITIONAL PRETZEL, STEP 1: Make a loop.

- STEP 2: Twist the loop to create a vertical infinity sign.

- STEP 3: Twist the loop once again.

- STEP 4: Bring the ends of the rope up to meet the top of the circle, keeping them apart.

- Bake the pretzels 10-15 minutes....

- ...until golden brown.

- And then I just had more fun with the fingers...(watch out for that sharp knife...)

Just by the way, I do love a good, salty, soft, glazed and golden pretzel. If anyone has ever been to Zurich train station and eaten a hot pretzel with cheese, they will know exactly what I am talking about. I can still remember the taste, and I am going back to 1986!
While I was playing with pretzel dough, thought I should also bake some real pretzels. But how on earth to roll them? I tried Auntie Anne’s YouTube video first. It started off with such clear step by step instructions until the most crucial part which I just could not follow. So next I tried Wikihow which gave me a better idea of how to do it, although I don’t think my pretzels are exactly as they should be. But for a first go (if I may say so myself) they looked pretty nice…


I am actually thankful to the holder of this website who has shared
this enormous post at here.